Step 1
Download the Uploadify JQuery plugin and the JQuery Library using the links below.
Download JQuery
Download Uploadify
Once downloaded you’ll need to place the below four files
1. jquery-1.3.2.min.js
2. jquery.uploadify.js
3. uploader.fla
4. uploader.swf
in a folder called scripts in the root folder of your ASP.Net website application
Step 2
Start Visual Studio, create a new website and do as done below
Inherit the following files you downloaded earlier in the head section of the aspx or the master page
<link rel="Stylesheet" type="text/css" href="CSS/uploadify.css" />
<script type="text/javascript" src="scripts/jquery-1.3.2.min.js"></script>
<script type="text/javascript" src="scripts/jquery.uploadify.js"></script>
Add an ASP.Net FileUpload Control to the form tag
<form id="form1" runat="server">
<div style = "padding:40px">
<asp:FileUpload ID="FileUpload1" runat="server" />
</div>
</form>
Place the following script in the head section or the ContentPlaceHolder in case you are using Master Pages
<script type = "text/javascript">
$(window).load(
function() {
$("#<%=FileUpload1.ClientID %>").fileUpload({
'uploader': 'scripts/uploader.swf',
'cancelImg': 'images/cancel.png',
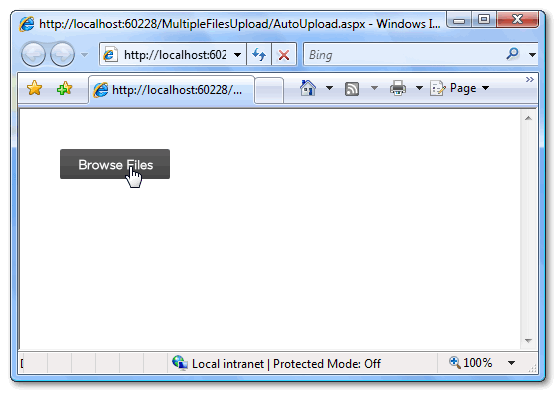
'buttonText': 'Browse Files',
'script': 'Upload.ashx',
'folder': 'uploads',
'fileDesc': 'Image Files',
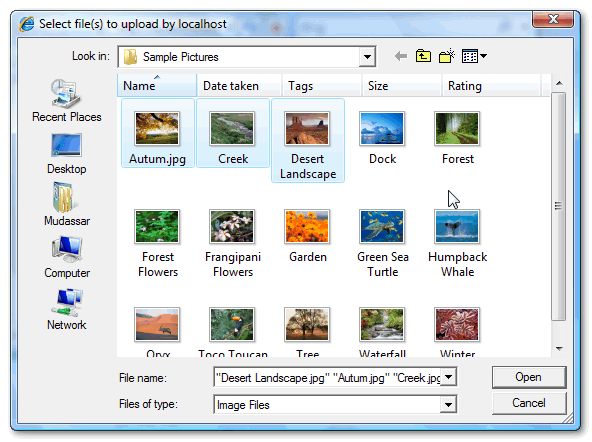
'fileExt': '*.jpg;*.jpeg;*.gif;*.png',
'multi': true,
'auto': true
});
}
);
</script>
As you can see we need to specify some settings along with the FileUpload control. The complete list of settings and their description is available here
Important setting to point out is 'script': 'Upload.ashx' which will handle the FileUpload and save the uploaded files on to the disk.
Below is the code for the Upload.ashx file
C#
<%@ WebHandler Language="C#" Class="Upload" %>
using System;
using System.Web;
using System.IO;
public class Upload : IHttpHandler {
public void ProcessRequest (HttpContext context) {
context.Response.ContentType = "text/plain";
context.Response.Expires = -1;
try
{
HttpPostedFile postedFile = context.Request.Files["Filedata"];
string savepath = "";
string tempPath = "";
tempPath = System.Configuration.ConfigurationManager.AppSettings["FolderPath"];
savepath = context.Server.MapPath(tempPath);
string filename = postedFile.FileName;
if (!Directory.Exists(savepath))
Directory.CreateDirectory(savepath);
postedFile.SaveAs(savepath + @"\" + filename);
context.Response.Write(tempPath + "/" + filename);
context.Response.StatusCode = 200;
}
catch (Exception ex)
{
context.Response.Write("Error: " + ex.Message);
}
}
public bool IsReusable {
get {
return false;
}
}
}
VB.Net
<%@ WebHandler Language="VB" Class="UploadVB" %>
Imports System
Imports System.Web
Imports System.IO
Public Class UploadVB : Implements IHttpHandler
Public Sub ProcessRequest(ByVal context As HttpContext) ImplementsIHttpHandler.ProcessRequest
Dim postedFile As HttpPostedFile = context.Request.Files("Filedata")
Dim savepath As String = ""
Dim tempPath As String = ""
tempPath = System.Configuration.ConfigurationManager.AppSettings("FolderPath")
savepath = context.Server.MapPath(tempPath)
Dim filename As String = postedFile.FileName
If Not Directory.Exists(savepath) Then
Directory.CreateDirectory(savepath)
End If
postedFile.SaveAs((savepath & "\") + filename)
context.Response.Write((tempPath & "/") + filename)
context.Response.StatusCode = 200
End Sub
Public ReadOnly Property IsReusable() As Boolean Implements IHttpHandler.IsReusable
Get
Return False
End Get
End Property
End Class
As you will notice that the handler simply accepts the posted files and saves the file in folder called uploads inside the website root directory whose path is placed in an AppSettings key in the Web.Config file Refer below
<appSettings>
<add key ="FolderPath" value ="uploads"/>
</appSettings >
That’s all you need to do now run the application and you’ll notice your website running
Browsing the File
Selecting Multiple Files Simultaneously
Uploading Multiple Files with upload progress
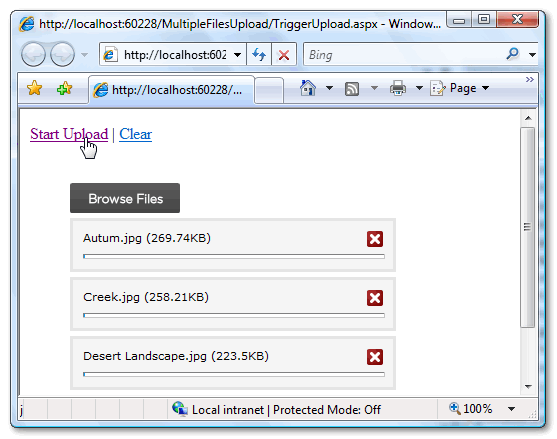
You might have noticed that the files are auto uploaded once browsed if you do not want this feature you can simply set the'auto' settings to false. But in that case you’ll need to provide a trigger the uploading of files on user interaction by placing an Upload button
First you’ll need to set the Auto Upload setting to false refer the bold part
<script type = "text/javascript">
$(window).load(
function() {
$("#<%=FileUpload1.ClientID%>").fileUpload({
'uploader': 'scripts/uploader.swf',
'cancelImg': 'images/cancel.png',
'buttonText': 'Browse Files',
'script': 'Upload.ashx',
'folder': 'uploads',
'fileDesc': 'Image Files',
'fileExt': '*.jpg;*.jpeg;*.gif;*.png',
'multi': true,
'auto': false
});
}
);
</script>
Then add the following link that will trigger the upload
<a href="javascript:$('#<%=FileUpload1.ClientID%>').fileUploadStart()">Start Upload</a>
That’s it now until user clicks the above link uploading of files won’t take place. Now since the upload is triggered by user it would be great to give him an additional link to clear the browsed files in one go
<a href="javascript:$('#<%=FileUpload1.ClientID%>').fileUploadClearQueue()">Clear</a>
No comments:
Post a Comment